


The issue-tracking process begins when a new issue is added to the ExtraView database. Like all screens in ExtraView, the Add Issue screen is highly configurable. All fields and other elements on the form are all configured by the administrator. Likewise, the business rules that are followed to validate data and ensure that your company's processes are followed are also configured by the administrator.
To Add a New Issue:
- Click the Add button on the ExtraView navigation bar.
- The Add button may have a list of entries that signify the different business areas of ExtraView. Each business area is a separate workflow or tracking solution within ExtraView and each separate workflow typically has separate fields on the screen, and will have a separate process to other business areas within your database.
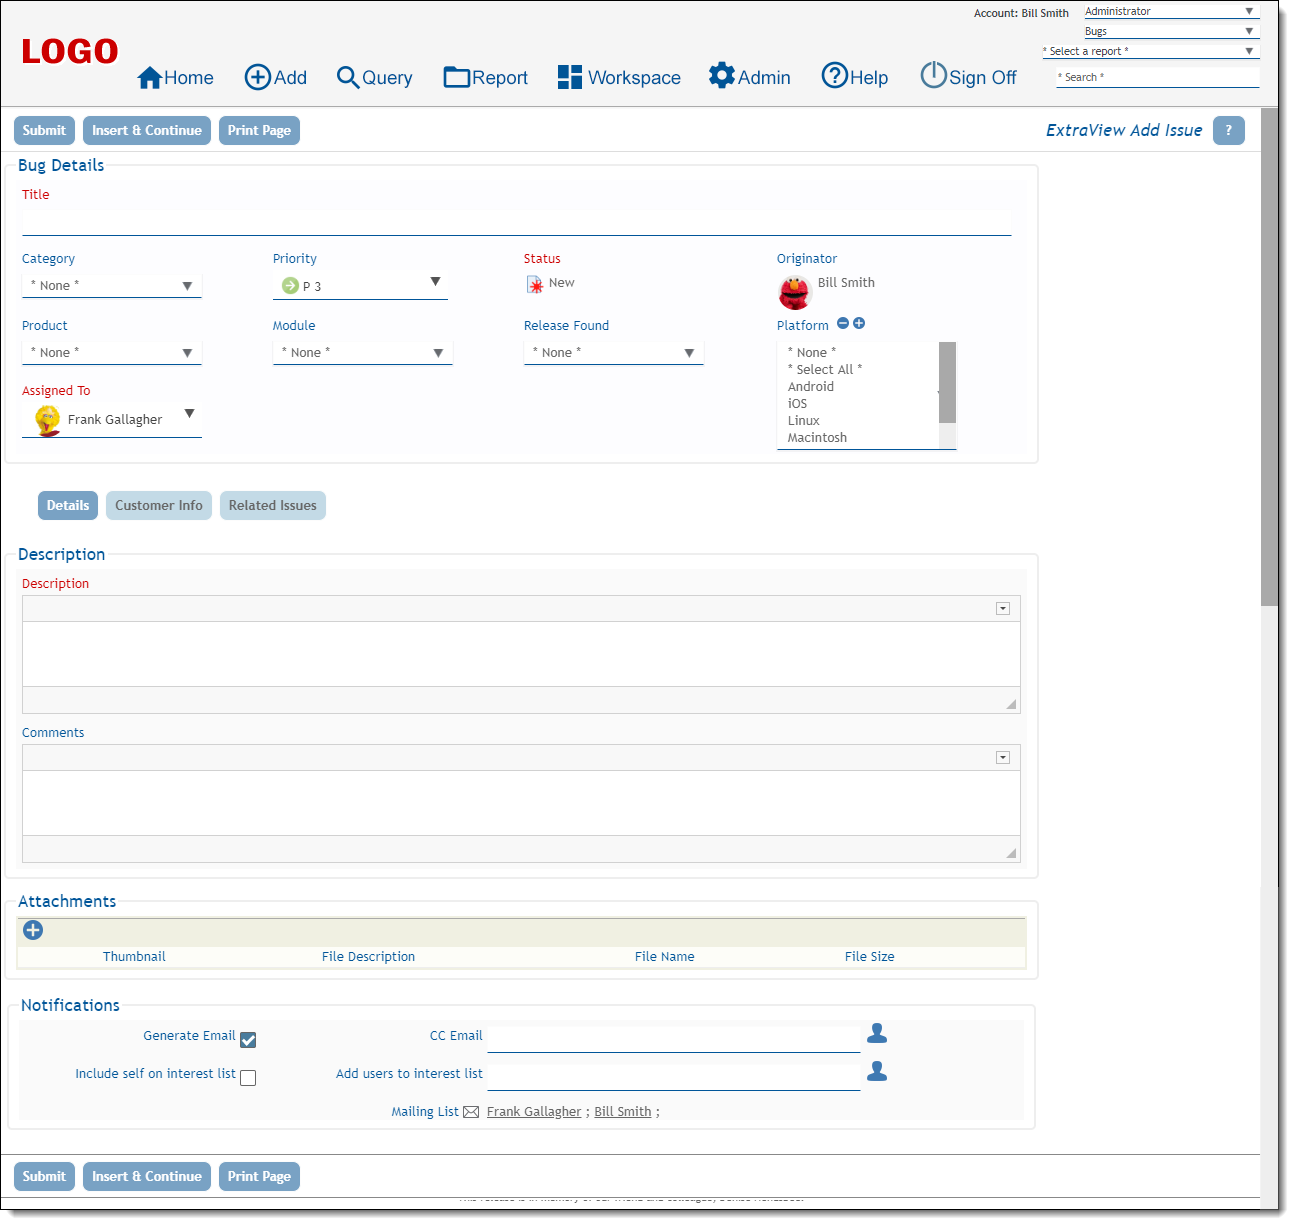
- On the ExtraView Add Issue screen below, enter information in the various fields as appropriate, and then click the Submit button.
- Note that tabs or buttons in the middle of the screen provide access to other fields within the same tracking application. When you click on one of these tabs or buttons different fields will appear on the screen to replace the fields beneath the current tab or button
- To disable automatic email generation, de-select the Generate Email box. Select the name of a desired "one-time" automatic email recipient in the CC Email field. Click the mailing list link icon to see the list of all current email recipients.
- If you want to include yourself on an interest list for the issue, so you receive notification each time the issue is updated, check the Include self on interest list button.
- Field names displayed in bold or in a color are required entry fields. Note that your administrator may have altered this feature and another means of highlighting may be used for the required fields. Also, note that where field dependencies exist, a selection must first be made in the parent field's picklist in order for the child field's data to appear. For example, if the Module is dependent on the Product then you must select a Product first.
All date fields will have an adjacent "calendar" icon. Clicking this icon will bring up a popup window that will allow you to navigate to the correct year/month/date.
User fields may have an associated "user list icon" that presents an alphabetical listing of user names for your selection. Click the icon to generate a popup window containing selections. Alternatively, the user fields may have been configured so that you start typing a name and a list of all users who match your keystrokes will appear. You make a selection from these entries
Fields with an associated link button allow you to link to another site, application, or window within ExtraView. Click the link icon to navigate to the location as determined by your administrator

Text area and comments fields have Shrink and Expand buttons that allow you to size the text input area to a suitable size
- If the text area or comment field has been configured to allow rich text, there will be a toolbar above the field where you can make selections, similar to any word processor. These fields also allow you to embed images and documents. You may either drag-and-drop these items on the field, or paste them from items copied to your clipboard
- You can add any number of file attachments from the Add Issue screen
- There may be repeating fields on the input form. Repeating fields have an additional button that allows you to add additional values for the field. Click the button to generate a new entry row for the repeating field opens on the screen. For example, you may have a configuration where you can split an issue into several sub-issues
- It is likely that you will use notification features on the add issue screen to inform various parties of the new issue. You may be able to turn the notification off and on for the issue, and to copy additional parties as necessary. ExtraView will have made decisions on who should be copied, as specified by the administrator and the selections you have made when filling out the form.
Reference
Additional information: http://docs.extraview.com/extraview-21/end-user-guide/managing-issues/adding-issue